Do you want to create mesmerizing photos by learning to sharpen your focus at night?
Night photography can be very challenging, but it can also be very rewarding if you happen to know what you are doing. Very few things are as beautiful as a sharp picture on a sky full of stars on a clear night.
Since photography depends on the availability of light to generate an image, one of the biggest challenges of taking pictures of the night is getting an exposure at all. Even if you can get an exposed image, getting it to look sharp is one of the hardest parts of all.
With that in mind, here are 9 photography tips to help you take sharper pictures at night.
1. Turn Off Your Lens and Camera’s Autofocus Settings

The autofocus on most modern cameras is very sophisticated and precise compared to what it used to be when it was a new technology. However, it is still not 100% fool-proof. This may come as a surprise to you at first, but you will find it easier to focus in low light if you use the manual focus lens and camera settings on both your camera and lens. You can try to aim for the bright spot and use that as a focal point, but if you cannot find a spot bright enough to focus on, then you might as well just do it manually.
2. Use the Live View Settings on Your Camera

If your digital camera comes with a live view option, then you may find it beneficial to use in low light. Since it is larger than the viewfinder, it will be easier to see. It also has a button you can push to focus it if you can find a spot bright enough on which to focus automatically. Even with manual focus enabled, the live view still gives you a larger view of your composition and one that looks more like what it will actually look like as a picture.
3. Use The Autofocus Assist Beam

If you are in a situation where it is dark, but not too dark to use autofocus, then one thing you can do to save time and trouble is to use the assist beam. It is a small but bright infrared light that acts like a laser. If your camera does not have one, then you can purchase one separately.
4. Bring A Flashlight With You

As ridiculous as it may seem at first, you might actually want to have a flashlight on hand when you take pictures at night. By bringing a flashlight with you, this gives you another temporary light source that you can shine on the targeted object to get it in focus. The drawback of this is that you have one hand on the light and another hand on the camera. Of course, if you have an assistant with you, that point becomes moot.
5. Try Focusing on the Edge Instead of in the Middle

Since most modern digital cameras use contrast detection to focus on an image – contrast being the difference between dark and light — your first instinct may be to focus on a point between those two. Resist that urge, look for the edge of the brightest spot you can find, and use that as your focal point.
6. Boost the ISO

The higher the ISO, the less light you need to actually get an image. If your pictures are coming out too dark, this could be one reason why. You can try brightening it after the fact in Adobe Lightroom, but that is no guarantee your image will still be satisfactory. Just remember, the higher your ISO, the higher the amount of image noise there is going to be. You can reduce the noise in post-production, but this just adds more work to do after the fact.
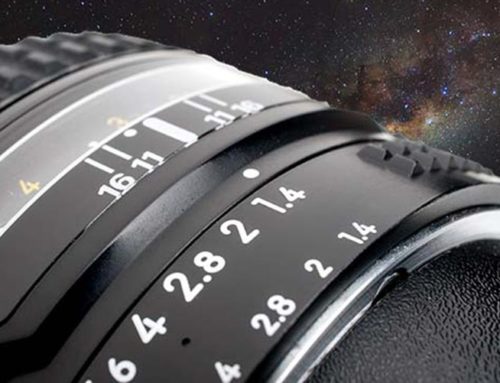
7. Check Your F-Stop and Shutter Speed

Another factor that can affect the sharpness of your pictures is your lens’ f-stop setting. If it is set at too high a number, then it may be impossible to get a latent image out of it. If it is set too low, then that may make it hard to focus your picture. Likewise, a high shutter speed can reduce motion blur, but it requires more light just to get an image. Play with a bunch of different settings until you hit the sweet spot.
8. Take Another Picture

If all else fails, then you may have to take multiple photos with different focus settings to get the results that you want. Try setting it to infinity, and if that does not work, then go from there until you see something where the targeted object is within the acceptable field of view.
9. Increase the Sharpness Settings in Adobe Lightroom

One of the best things about post-production is that it allows you to fix some, but not all, of the mistakes you made in the shooting while letting you adjust the color tones and brightness to your own preferences. It also allows you to make a soft picture look sharper and vice versa with its sharpness adjustment tools. With Adobe’s post-production software options, you can sharpen the edges and the rest of the picture independently of one another. Unfortunately, you still cannot bring an out-of-focus shot in focus after the fact, nor can you completely eliminate motion blur in post-production. This is why it is important to get your pictures right in camera as much as possible as often as possible.
Conclusion
A skilled photographer knows how to control the light to create an image, even when there is not a lot of ambient light available. Creating sharp images in low light can be hard to do, and it requires some skill and practice, but it is not impossible once you have gotten the hang of these photography tips. Incorporate them into your outdoor night photography sessions, and keep taking pictures regularly, and your work will continue to improve in quality every single time.
![How to Photograph the Milky Way [Correctly]](https://presets.com/wp-content/uploads/2019/09/how-to-do-Milky-Way-Photography-500x383.jpg)