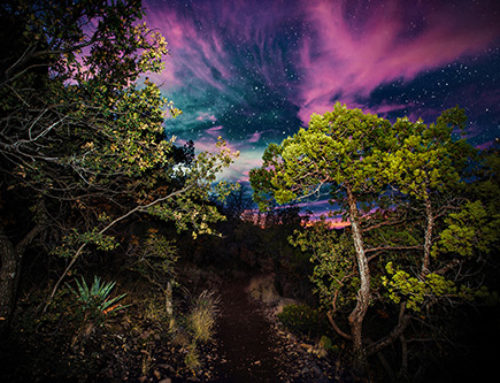
There are very few sights as captivating as the night sky. Needless to say, most of us are hypnotized by the tantalizing beauty of the galaxy. However, we are well aware that we will never get any closer to the stars, and that leaves us with only one option: to capture them at their best and relive the moment until we can see them again.
Fortunately, tech advancements have made it possible for anyone to venture into astro photography. Nowadays, hobbyists and professional photographers alike have access to affordable and widely-available gear. But, even with the best equipment, you will not produce a higher-than-average image if you follow the wrong procedure and, most importantly, lack a proper post-processing Lightroom application.
Our guide will include three main sections namely:
- Equipment
- Procedure
- Post Processing
Equipment
For your milky way photography to be , you need to have a concise astro photography kit. This is one of the situations where the phrase “you are as good as your gear” becomes relevant. The following is a checklist of the things that you should not miss:
- A Digital Camera
- A Tripod
- Fast Wide Angle Lens
- A Headlamp
- Smartphone Star Map App
- An Intervalometer Remote Timer
A Digital Camera
Contrary to common speculation, you do not always need an expensive camera to for brilliant milky way photography. Essentially, any Digital SLR (DSLR) or mirrorless camera with Micro 4/3 sensor or larger is good for the job, especially if paired with the right lens.
It is prudent to only get a camera that can operate at ISO 3200 and above without much compromise on image quality. Your camera also needs to have a good EVF (electronic viewfinder) or a Live View screen for focusing on and composing your shots.
A Tripod
Your photography sessions may last for hours and you do not want to hold the camera for that long. A good tripod is lightweight yet stable. You will also find that tripods with a ball head are easier to recompose than those with a pan-tilt head.
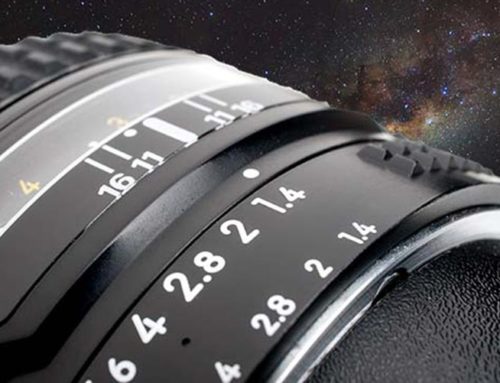
Fast Wide Angle Lens
You need a lens with a short focal length and a low aperture f/number rating. Most digital cameras come standard with the 18-55mm f/3.5 – 5.6 lenses which can be a bit slow even on the minimum setting. As you advance, you will need to invest in a lens with an aperture of at least f/2.8.
A Headlamp
You will be filming in the dark, you need a way to see your equipment and path. I recommend an LED headlamp with a red “night vision” mode.
Smartphone Star Map App
There are several free and premium applications that will help you to locate the Milky Way so as to know where to direct your camera.
An Intervalometer Remote Timer
This is an optional feature for people with shaky hands. The device enables you to trigger your camera remotely to avoid shaking it and blurring the photos. It also helps when you want to make time-lapse sequences.
Procedure
First, you need to find a large, open space with a unique and beautiful landscape. Then you need to find a dark sky on a dark night. Confusing, right? It is always advisable to photograph on a day that is close to the full moon as the nights are usually darker for longer. You also want a clear night for the best results.
You should follow the following procedure while setting up your camera:
- Shoot in RAW mode because it allows for greater flexibility when post-processing as compared to JPEG mode.
- Zoom out as much as possible to capture as much as possible and to reduce streaking of the stars caused by the Earth’s rotation.
- Adjust to the manual focus mode usually designated with M or MF and then put it at infinity. Then activate live view and keep on adjusting until your camera is well-focused.
- Adjust your exposure mode to Manual (M)
- Reduce long exposure noise if you can so as to to avoid grainy photos.
- Enable the histogram feature to be able to see a graphic display in the image review so as to adjust the exposure accordingly.
- Use automatic white balance to prevent moonlight or light pollution from changing the white balance.
Post Processing
Capturing the Milky Way is only half the battle. The rest you fight when you start post-processing. The process allows you to bring out your image’s finer details and to correct imperfections such as distortion, vignetting, and chromatic aberration. Additionally, post-processing enables you to polish your final product by correcting crop, rotation, white balance, and perspective.
Post processing is as simple or complicated as the tool you use. Many tools out there are not capable of enhancing your photos while still retaining their raw quality. Since RAW images are usually pretty flat, you will require a great post-processing feature such as Adobe Lightroom to edit them to their best. Ultimately, you will be judged not by what you capture but by how much of the hidden details in your photograph you are able to reveal.