Ever since the invention of photography in 1826 by Joseph Nicéphore Niépce, the art, craft, and technology involved in taking a single still photograph has changed. These are changes that no one could ever have foreseen all those years ago. Even the rapid developments in digital photography over the last 20 years must have seemed like pipe dreams in George Eastman’s time, or even in the Great Depression of the 1930s when the Kodak Brownie was the most popular new camera. Do not let all the bells and whistles of your new digital camera intimidate you; while they may seem confusing at first, eventually, as soon as you familiarize yourself with them and what they do, you will find them easier to master. Let this landscape photography guide show you how to take great-looking pictures in almost any kind of environment.
Landscape Photography Essential Equipment
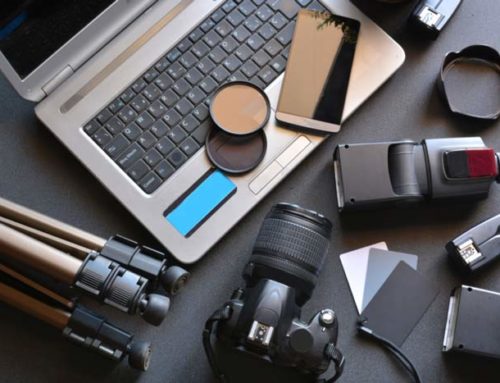
In addition to the most obvious supplies — your camera and its lenses — you are going to need to bring the following supplies along with you on your photographic journey:
- a bag
- batteries
- a flash
- batteries for the flash
- a tripod
- a light meter
- cleaning supplies
The first four of those are just plain common sense for any photographer to have around. A bag is necessary to carry everything, batteries are necessary for power, and a flash can provide a fill light where there is darkness. However, the tripod is going to prove to be the most necessary piece of equipment you will need after those because it is invaluable in helping you keep your camera still and steady. This is especially important if you want to take long exposure shots in low light, or if you want to take HDR shots that require multiple exposures. Filters are also useful to have on hand in the event that you are in a situation where you need to darken a bright sky.
You might also want to invest in a dedicated light meter. This is an invaluable tool professional photographers use to determine what the ideal shutter and aperture settings should be to get the correct exposure. However, if you are just a beginner or an intermediate photographer, then most modern digital cameras offer in-camera meters that should prove to be acceptable for all but the most extreme lighting conditions. Even cell phone apps now have the ability to do this with reasonably good accuracy.
One more way to minimize the amount of time you will need to spend editing your pictures is to make sure that both your lenses and the camera’s aperture are clean. Dust, dirt, and unsightly smudges can get embedded in the original image, meaning you will have to cover it up in Photoshop. But by cleaning it first, you can prevent, or at least minimize, this unnecessary step so that you can focus on putting the finishing touches on it. Keep a lens cleaning kit with cleaning fluid, a soft cloth, and an air syringe bulb with you because you are always going to need it. You can never predict when an accident might happen that would cause it to get dirty.
Landscape Photography Locations
Whenever you pick up a camera, the world becomes your inspiration. While it can be fun, productive, and rewarding to plan a photo tour around an exotic and photogenic overseas location, that does not mean there are not still places you can find locally that will provide you with ample opportunity to take as many pictures as you feel like. However, some of them may require you to get permission first. In that case, using a release form, the way a professional photographer would, can prevent legal issues from coming up later. Some of the places you can find that can offer the opportunity to create breathtaking landscape pictures include:
- public parks
- farms
- nature trails
- beaches and lakes
- mountains
- forests
- open roads and fields
Depending on where you decide to take your pictures, you are going to have to dress appropriately. If it is too cold for shorts, then wear long pants. If it is too hot for long pants, then wear shorts. You will also have to take the weather into consideration when packing supplies. A garbage bag can help protect you and your camera from the rain and the snow. Planning ahead of time can make the difference in terms not only of actually being there at the right time to take the pictures you want to take but in terms of ensuring your own personal safety and comfort as well. Be safe, not sorry.
Landscape Photography Camera Settings
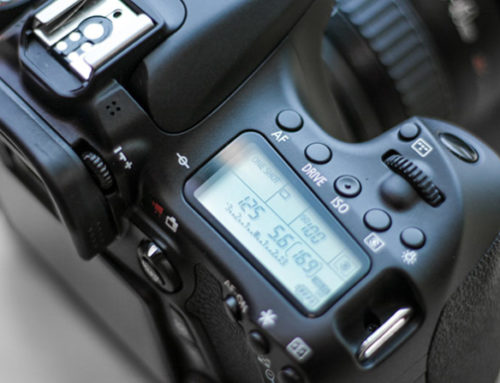
Your camera has several modes you can use to shoot either manually or automatically. The manual setting allows you to adjust the camera’s ISO and shutter speed and the lenses’ aperture independently of one another. This is necessary if you want to have as much control over the outcome of the final image as possible.
On the other hand, you may often find yourself in a situation where it is actually beneficial to use the non-manual settings on your camera. There are multiple ways to do this:
- Some cameras have modes where you can adjust the shutter speed automatically and the f-stop manually, and vice versa.
- Some cameras also offer settings that allow you to adjust the ISO manually while the camera automatically looks for the best f-stop and shutter speed setting. This is necessary if you want to be able to capture fast motion without either motion blur or underexposure.
If you want to take high-dynamic range (HDR) shots, then one feature that can help make that work for you is the Exposure Compensation feature. By taking three shots in rapid succession — one overexposed by a stop, one underexposed by a stop, and one at normal exposure — you get three images of the same subject that separately cover the lightest parts, the darkest parts, and the subtle gradations of light, color, and detail between them. The effect can be stunning when done right. Unless you have a really steady hand, it is recommended that you use a tripod when taking an HDR picture.
Landscape Photography Tips and Tricks
Landscape photography often relies on wide-angle shots with deep depth of field (the area in which everything is in focus) to make everything look sharp and clear. There are several easy steps you can take in order to achieve this look:
- It helps to have a wide-angle prime lens rather than a zoom lens.
- You should also shoot in bright daylight so you can have enough light to set the lens to a high f-stop and the camera’s shutter speed. The higher your f-stop number is, the greater the area of focus you will have. However, with every stop, you block light from coming into the camera.
- One way to let it back in is with a lower shutter speed. The trade-off is that this makes it harder to capture sudden fast motion.
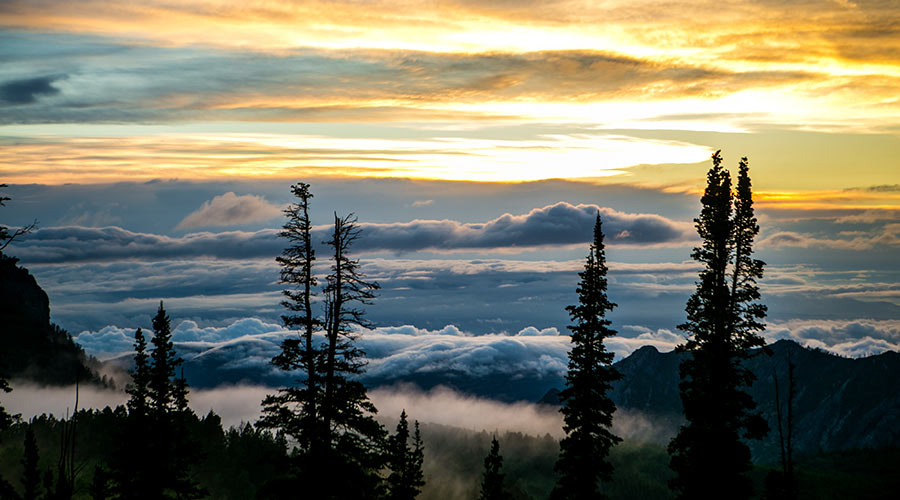
Sometimes, if it is so bright out that your pictures are still overexposed even after you have set the lens to a high f-stop and the camera to a fast shutter speed, then you will need to use a neutral density filter. There are two types of these filters. One darkens the whole frame, but the other kind is a graduated filter that only covers the top or the bottom; it is helpful whenever you have to make the sky and the land look evenly exposed. This is one reason many photographers prefer to shoot during what is called “the golden hour,” the time about 30 minutes to an hour after sunrise or before sunset when the light has an almost golden, ethereal quality to it that is softer, subtler, and more pleasing to the eye than the harsh, direct light of the midday sun. This is why it is sometimes best to wait until the light is just right. Unfortunately, you may not always have the luxury of time. Situations such as those are why it is helpful to have filters on hand when you just do not have time for nature to give you the right kind of light.
Another type of filter that you can use to elevate the quality of your pictures to an even greater level than before is a circular polarizer. Photographers have used this for years to darken a blue sky and to reduce glare from shiny objects and bodies of water. Cokin is one of the most popular manufacturers of camera filters, and they offer both neutral density filters and circular polarizers. Other companies that make them include B+W and Hoya. Tiffen makes filters for both physical and digital work. Some camera filters are the kind that you can screw directly onto lenses, while others, such as Cokin’s, are square shaped and require additional adaptors to slide in and out of them and in front of the lens.
Inversely, what do you do when you find yourself in a situation where you have a fast shutter speed and a high f-stop, but you need more light? You use a flash. It can also prove invaluable for nighttime photography, as it can cast light on dark areas and create interesting effects while preventing certain areas from looking underexposed. You can also use them for multiple exposures that can look stunning and creative. Do not overuse the flash because not only do you run the risk of running out of battery power — this is why purchasing a set of rechargeable batteries can help save you money in the long run — you can end up making your pictures look flat and artificial.
Landscape Photography Post Production
No landscape photography guide would be complete without a section on how to edit your photos. While some cameras give you the option to do this in camera, this is a destructive option that can override the original and make those edits permanent. Here is a more non-destructive way to do it:
- Always back up your unedited photos in case you want to adjust it in multiple ways in post production.
- Once you have your digital files loaded into the computer, you can load them into a photo editing application, such as Adobe Lightroom.
- To adjust the color, aspect ratio, and orientation of your picture, you can either do that manually using the controls, or you can use one of the Lightroom presets to give your picture an extra special look.
Presets can be used to make either subtle or radical changes to your unaltered original RAW file. If you shoot in that format, the original will remain untouched and all the versions with presets applied to them will be saved separately without destroying the original. Here are some examples of what you can expect from these presets:
- If you want to make your picture look like it was shot in black and white, then you can do that with a variety of black and white filters. Each one accentuates different parts of the color spectrum. To get that effect from shooting with black and white film, you would have to put an actual color filter over the lens.
- Lightroom also offers color presets, from subtle enhancements that complement the natural beauty of a scene to extreme changes that give it a psychedelic look. You can even use them to replicate the look of color negative film or color slide film, or even to create a Lomography-style effect.
- It also offers presets that soften the image. While it is usually used on portraits of human subjects to soften skin glare and minimize blemishes, you can also use it to take a landscape picture that is too sharp-looking and make it look softer.
Getting your picture right in camera, or at least as close as possible to the kind of composition you want, can help cut back on a lot of post production time. Think about the kind of picture you want to take before you take it. Do not just randomly shoot without thinking about subject, location, composition, and exposure. Imagine it in your mind’s eye, but do not spend too much time thinking about it because you might end up letting the moment pass and losing the opportunity to capture a great moment. Ultimately, it is up to you to go out and take the great landscape pictures you are capable of creating.
Conclusion
Now that you have taken the time to learn all about these landscape photography tips and tricks, hopefully, you can use them to show that you know how to take landscape photography better than you ever could before. Thank you for reading this landscape photography guide. Now, it is time for you to start going out into the world and taking pictures as soon as possible so that the information you have just read about in this article will still be fresh in your mind when you do. If you would like to learn more landscape photography tips and tricks so that you can use them to become a better photographer, then you can learn all about them when you subscribe to this newsletter.